The traditional way to bind a quilt is to cut strips of fabric and create bias binding to sew along the edges of your quilt. However, there are several other methods you can use to bind a quilt. One of the easiest ways is the “self-binding” method. This is where you cut your backing fabric slightly larger than your quilt top and batting so that you can fold the backing onto the top of your quilt to create a nice finish. It’s rather simple, and we’re going to show you how to do it in this post, complete with mitered corners!
Step 1: Trim the Batting and Backing to Size
The self-binding method can be used on any size quilt. We think it is the fastest and easiest way to finish a quilt.
You’ll need to square up your quilt before you begin. It's helpful to have all of your quilt layers the same size. Then, trim the quilt top and batting back one inch all the way around, leaving your backing untouched. One inch is the most common size, but you can do more or less. The important thing is that your measurements are consistent all the way around.

Be careful not to cut into your backing fabric when trimming the quilt top and batting. You can fold the backing fabric out of the way or carefully trim on the top. Do whatever makes you feel most comfortable.
Step 2: Double Fold and Pin the Backing
Once your quilt is trimmed, start anywhere and fold the backing fabric halfway towards the edge of your quilt top. It should butt up right along the edge of your quilt top.
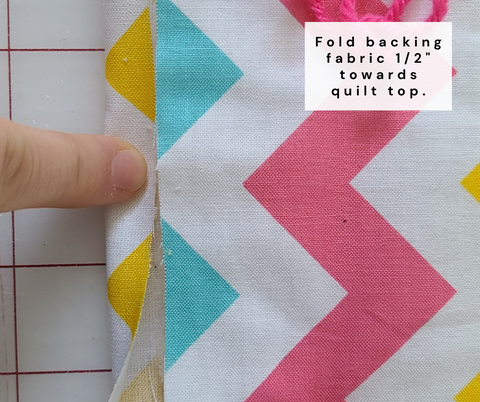
Press the fold to create a crease and then fold the backing halfway again to encase the edge of your quilt. Your binding will be ½ inch when complete. Pin the double fold in place and continue this folding down the side of your quilt.
Some people like to use a glue stick to hold the folds in place, but we prefer quilt binding clips so we don’t have to worry about gumming up our needle.

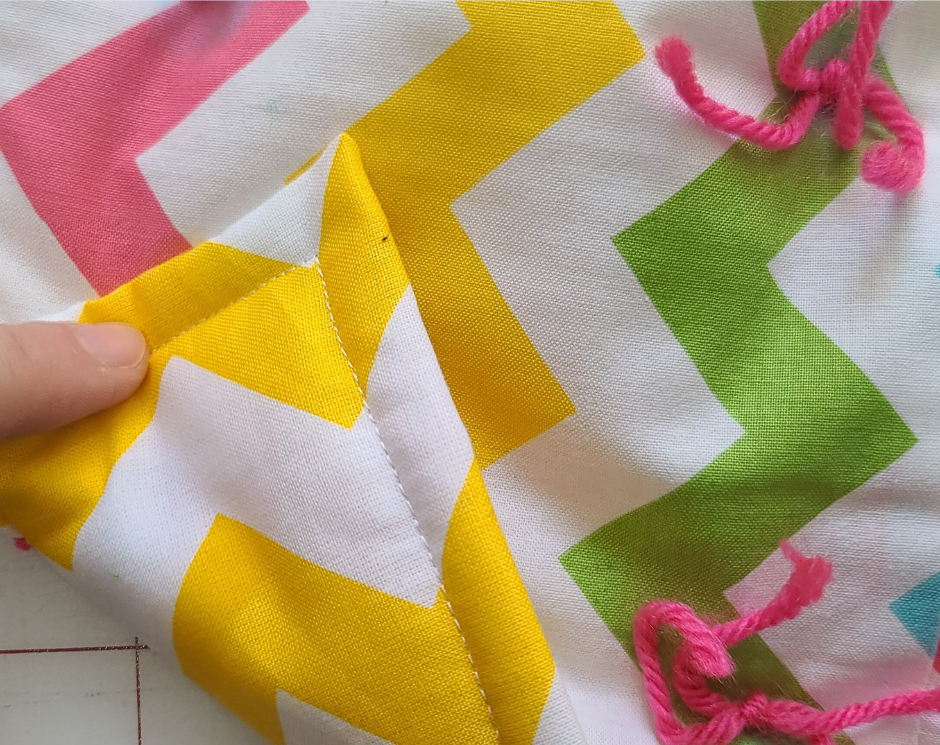
Step 3: Create Mitered Corners
When you get to a corner, fold the binding into a triangle, butting up to the raw edge on the next side of your quilt top.
Keep the triangle in place as you fold the next side the same way you did for the first side. This will form the mitered corner.


You might have to play with the corner a bit to get it just right.
Step 4: Sew the Binding in Place
After the binding is secured with pins or clips, head to your sewing machine to stitch it down. Use a straight stitch or a decorative stitch to attach the binding. We like to stich 1/8 inch in from the folded edge.

Use thread that matches or coordinates with your backing fabric. We also recommend using a walking foot to evenly feed all the layers through your machine. If you don’t have this specialty presser foot, you can get a universal one from Love Sew.
When you come to a corner, stop sewing with your needle in the down position and lift your presser foot to pivot to the next side of your quilt. Watch to be sure there are no tucks or puckers when sewing the mitered corners.

And there you have it! See how easy it is to bind a quilt with the backing fabric? We hope you give it a try.
What other quilt tutorials would you like to see? Leave us a comment below.
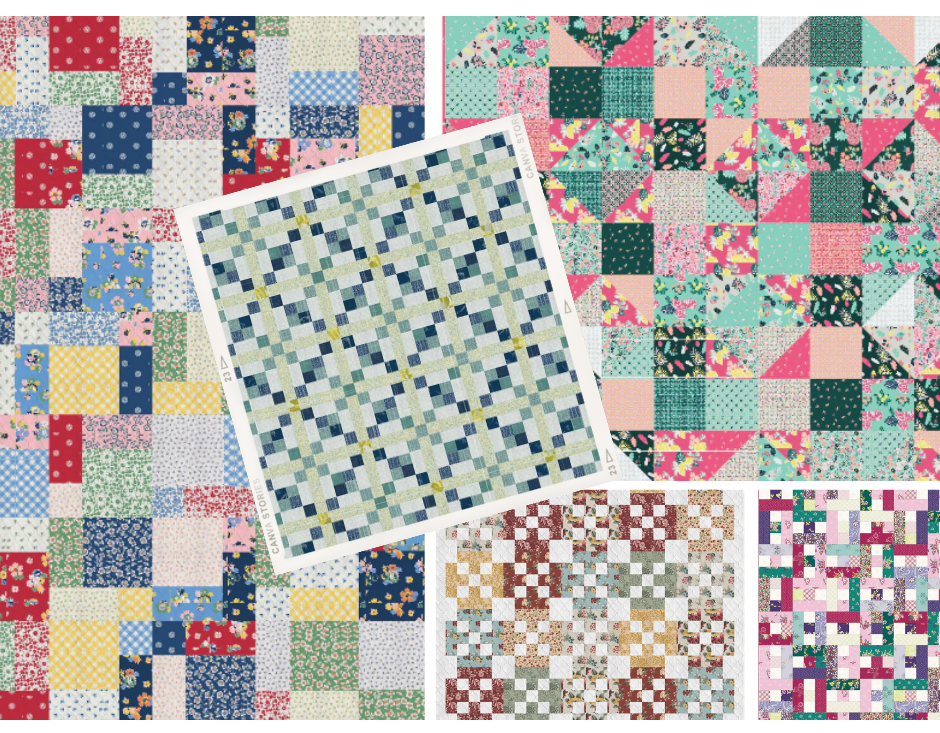
Don’t forget to also check out all the lovely Quilt Kits at Love Sew!
24 comments
Nancy
I have been doing bindings this way for a couple years now and really like it.
Martha
I am so glad to see this binding as a legitimate method. I had done this method years ago when I was just learning to quilt, because I did not understand how to calculate, measure and cut those strips of fabric for the binding. Thank you so much for sharing this. I feel like I have been truly legitimized.
Marcia
It looks so perfect and am looking forward to trying it. I have never been able to get a mitered corner on anything!
Sheila
This looks so easy. I have always wanted to completely sew a binding. My quilts will look so much better, with a lot less fuss. Thank you!
Linda
This method looks so much easier then sewing a strip. I’m always concerned about missing the edge on the back. I can’t wait to try this on my next quilt. Thank you.
Leave a comment
This site is protected by hCaptcha and the hCaptcha Privacy Policy and Terms of Service apply.