Happy July!
Summer is cruising along (too fast!) and we are ready for a new project. Want to join? During July our weekly blog post will feature a different star quilt block pattern. Sew along to make all four blocks into a sweet mini quilt at the end, or make a bunch for a bigger quilt.
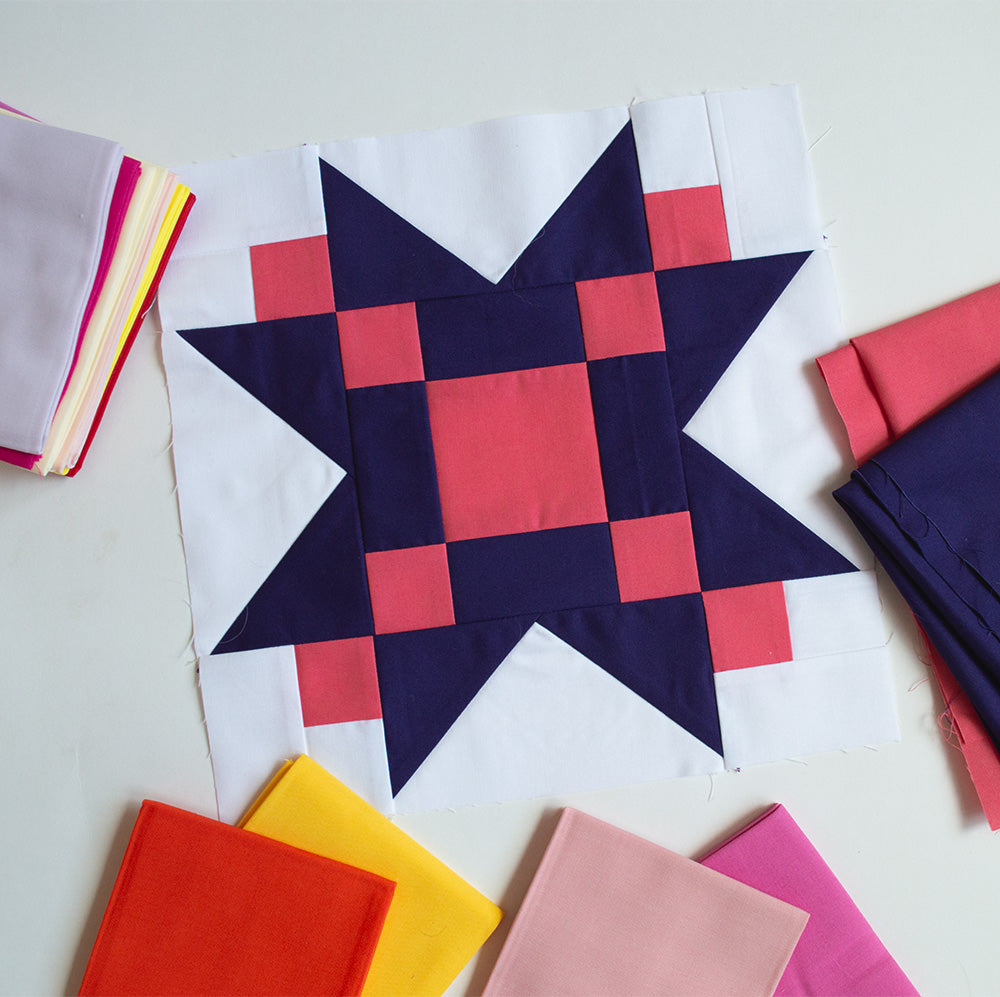
For the blocks I'm making here, I'll be using fabrics from the Daybreak fabric collection. You can find a Daybreak bundle here, or choose your own favorite colors or prints. These are going to be great for scraps! each block requires just two colors plus white.
Download Pattern Here

Here we go with block 1, July 4th.
Unfinished block: 12 1/2" square
Cutting the fabrics
White: cut one square 7 1/4"; four rectangles 3 1/2" x 2"; one strip 8" x 2"
Purple: four squares 4"; four rectangles 3 1/2" x 2"
Pink: one square 3 1/2"; four squares 2"; one strip 8" x 2"
Sewing
1. Cut the white 7 1/4" square twice on the diagonal to yield four quarter square triangles. (QST=quarter square triangle)

Cut the purple 4" squares once on the diagonal to yield two half square triangles per square, or a total of eight. (HST=half square triangle)
2. Start with one white QST and a purple HST. Position the triangles right sides facing so that the long angled edge of the purple triangle aligns with one angled side of the white triangle. Sew on the angled edge with 1/4" seam.

Press toward the purple triangle.
Repeat to add a second purple HST to the other side of the same white triangle. Press toward purple. Trim to 6 1/2" x 3 1/2".
Make four star point units the same way.
3. Sew the 8" x 2" white strip to the 8" x 2" pink strip on the long edge. Press toward pink.
4. Use ruler and rotary cutter to cut the pink/white strip into 2" sections. Cut 4 sections.

5. Sew a 2" x 3 1/2" white rectangle to each section made in step 4. Press toward the rectangle. Make four corner units.

6. Sew one 2" pink square to both ends of two of the 2" x 3 1/2" purple rectangles. Press toward pink squares.
7. Sew one 3 1/2" x 2" purple rectangle to opposite sides of the 3 1/2" pink square. Press toward pink.

8. Sew the 2" x 6 1/2" pink/purple units made in step 6 to opposite sides of the unit made in step 7. Press. This is the block center unit.
9. Arrange block components: place block center unit made in step 8 on sewing surface. Position the four star point units, one on each side of the center, oriented with purple toward center.

10. Place corner units so that the pink squares are toward the interior of the block forming a check pattern with pink squares in center unit.
11. Sew a corner unit to both ends of the top and bottom star point units. Press toward corner units.
12. Sew star point units to right and left sides of the center unit. Press toward center.
13. Sew the three 'rows' of the block together to finish. Press well.
You did it!
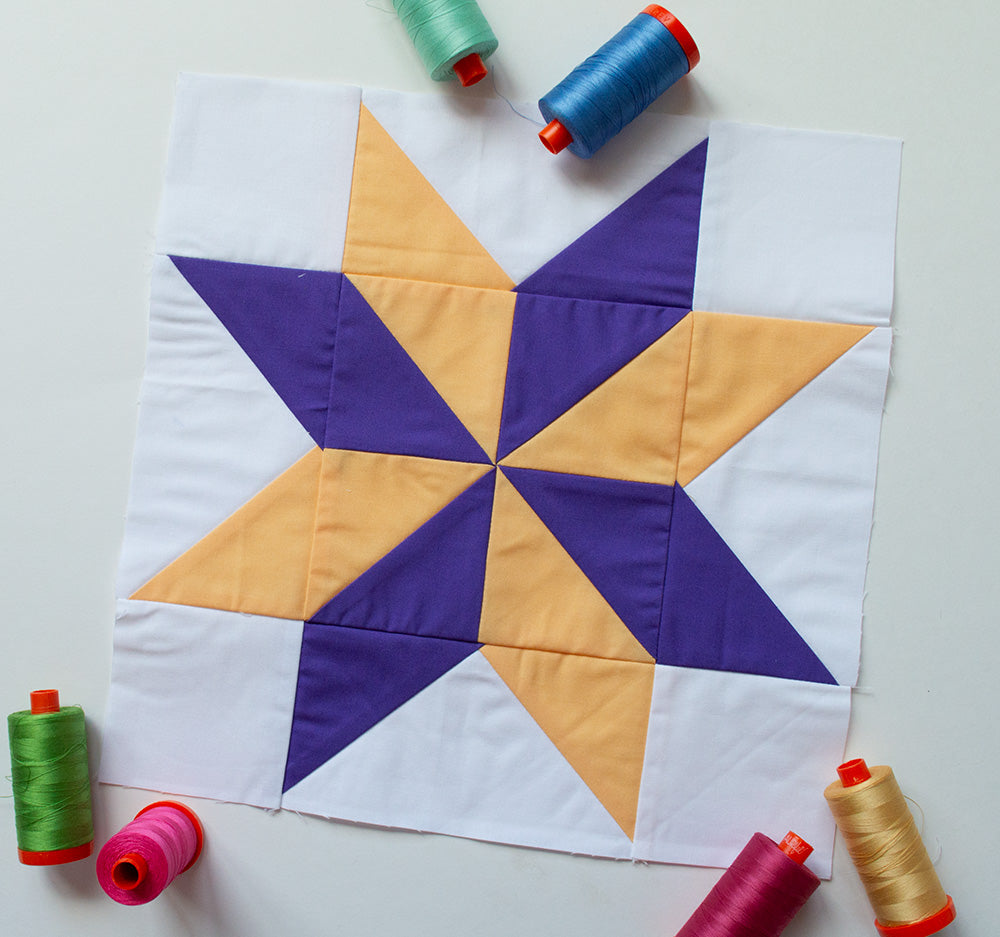
I created a couple of illustrated layout options so you can get the idea what this block looks like in multiples. Would you make a quilt with the blocks all the same like this?

Or, go for a scrappy look (or coordinated bundle) like this:

Now, choose your favorite colors -or go scrappy!- and make a July 4 block -or a whole bunch!-
See you next week,
Sharon

9 comments
Doreen
Thank u for ur help I love ❤️ it
Becky L Cook
Thank You Love Sew!
Pat Schaab
To print instructions, just highlight it all from top to bottom, right click, and print.
Patti Meyer
is there a way to be able to print the complete instructions for cutting and sewing this block and the first block too?
Peggy M White
Same question….how can I print the complete info on a regular computer?
Leave a comment
This site is protected by hCaptcha and the hCaptcha Privacy Policy and Terms of Service apply.