Did you enjoy sewing the July 4 block I showed you last week?
We would love to see what you make, be sure and post your star blocks in the Love Sew Facebook group all summer. I really hope some of you make whole quilts and show us how these cute blocks look in YOUR favorite fabrics!
If you missed it, find the instructions to make July 4 star, Here.
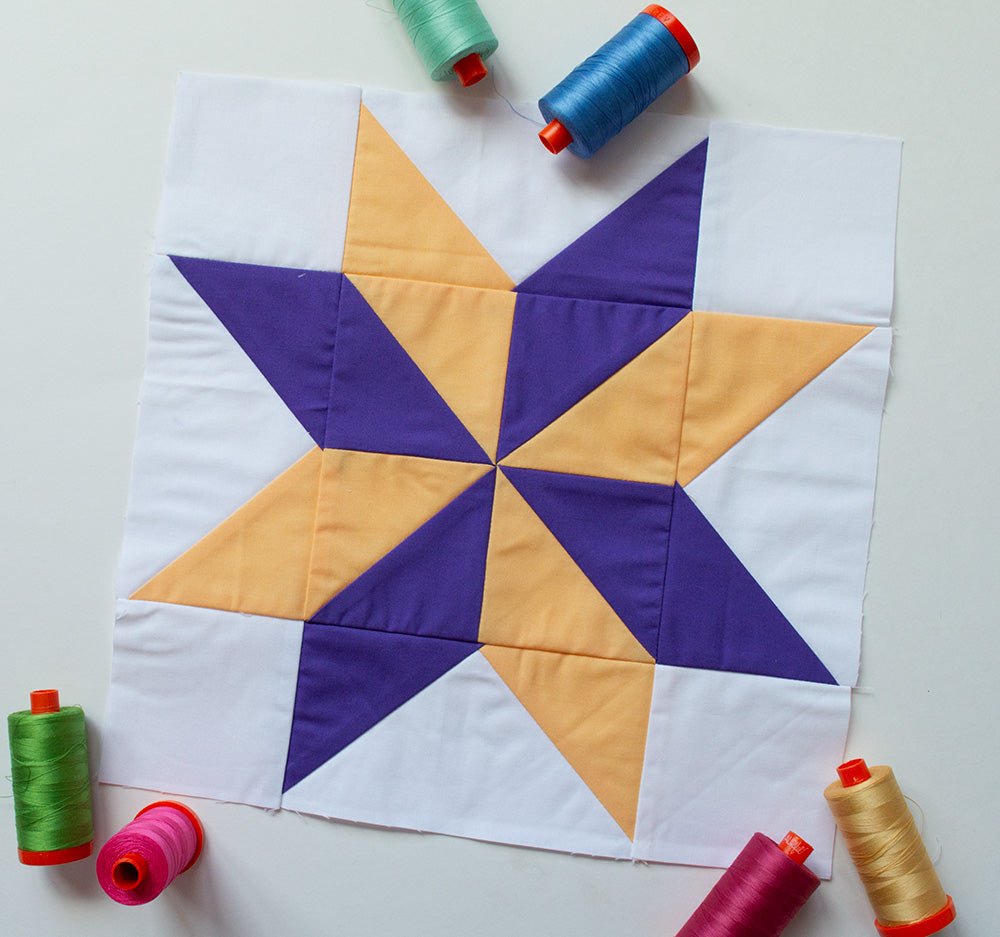
This week, we are going to make the Sparkler block. Ready?
As I mentioned last week, I am using a bundle of the Daybreak fabrics. If you want to follow along, you can get Daybreak fabric bundles, Here. Otherwise choose your own favorites and let's go.
click here to download a worksheet for this quilt block
Cutting
White: one square 7 1/4"; four squares 3 1/2"
Purple: four squares 4"
Yellow: four squares 4"
Sewing
1. Cut the 7 1/4" white square twice on the diagonal to yield four quarter square triangles. (QST= quarter square triangle).

Cut TWO of the purple and yellow 4" square once on the diagonal to yield two half square triangles per square, or a total of 4 per color. (HST=half square triangle)
2. Start with one white QST and a purple HST. Position the triangles right sides facing so that the long angled edge of the purple triangle aligns with one angled side of the white triangle. Sew on the angled edge with 1/4" seam.
See all the steps of this technique in last week's post, Here.
Press toward the purple triangle.
Repeat to add a yellow HST to the other side of the same white triangle. Press toward yellow. Trim to 6 1/2" x 3 1/2".
Make four star point units the same way. Make sure all of them are the same, purple on the right and yellow on the left as shown in photo above.
3. Match eah remaining 4" purple square right sides facing to a yellow 4" square. Mark the back of the yellow square once on the diagonal.

4. Sew 1/4" on both sides of the marked line, then cut on the marked line.
5. Press half square triangle squares and trim excess fabric points away. Each square should measure 3 1/2".

6. Arrange the HST square as shown above, four patch layout so that the colors alternate to make a pinwheel pattern. Note the position of the colors, it is important to make sure they are oriented correctly to match up with the colors in the star point units and achieve the desired look in the finished block.
Sew the squares first in pairs, press, then sew sets together to make block center unit.
7. Arrange the block units: place the block center made in step 6 on the sewing surface. Add star point units to all four sides. Note that the colors of the star points should be adjacent to matched color in the center unit, continuing the pinwheel pattern. Place the 3 1/2" white squares in corner positions.

8. Sew the white corner square to both sides of the top and bottom star point units. Press toward corner squares.
9. Sew star point units to the left and right sides of the center pinwheel unit. Press toward center.
10. Sew the three 'rows' of the block together to finish the block. Press.
And your Sparkler Star is finished!
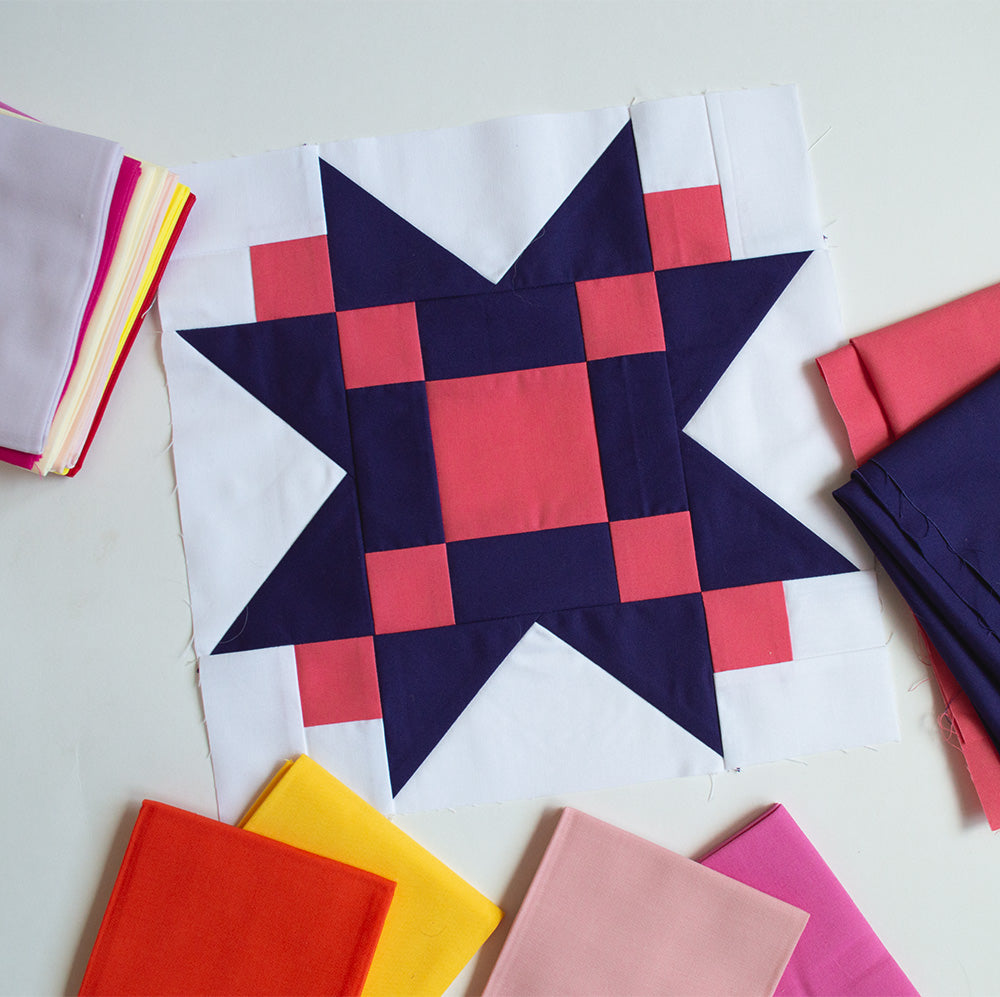
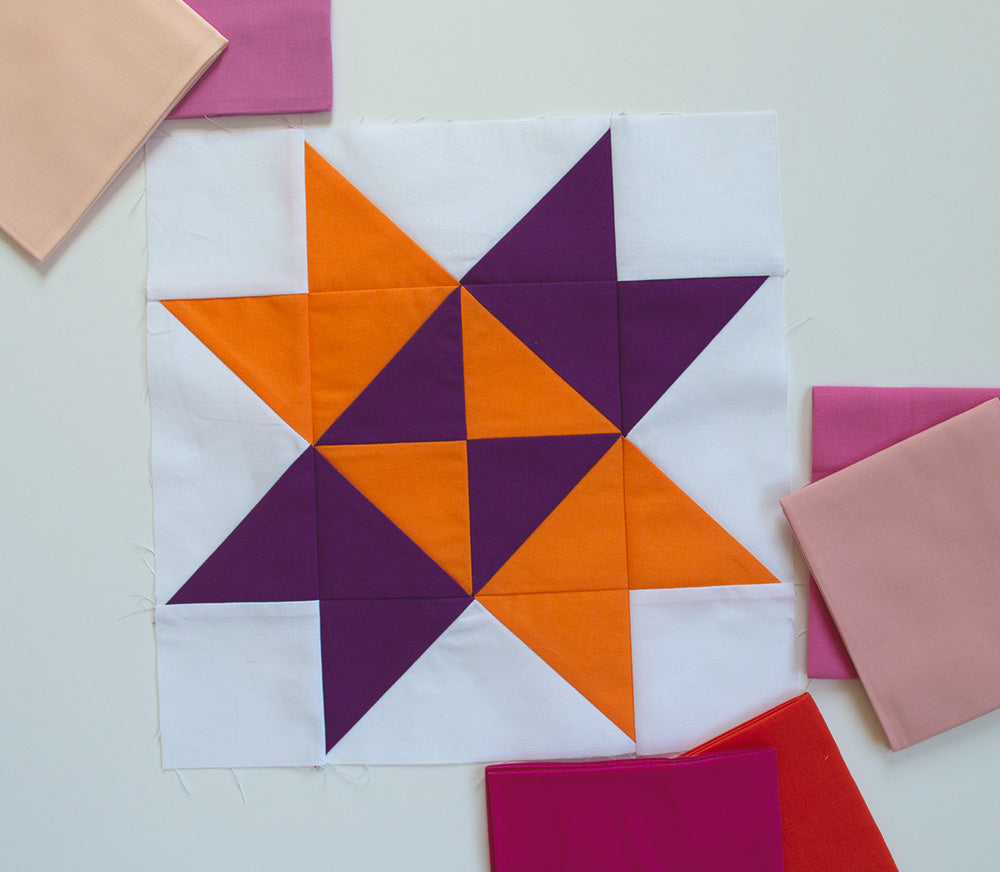
I made a couple illustrations to show how these look in multiples. Hope this inspires you...
All the same option:

Whenever I see two color things like this, it reminds me of sports teams. (-: ha ha!
Here it is in lots of colors:

Love these! Have fun,
Sharon
2 comments
Sharon Fagan
I really like the pattern would love to have a printout and will be more than happy to pay for it. Thank you,
Cindy koepke
Would like to be able to purchase printed instructions as I am one of many with no printer or access to one thank you love the pattern
Leave a comment
This site is protected by hCaptcha and the hCaptcha Privacy Policy and Terms of Service apply.