Get ready to meet the ruler that will change the way you cut fabrics for your quilts! Today, I'd like to introduce you to the True Cuts strips and shapes rulers by Love Sew. This set of three rulers is all about making your rotary cutting as quick and accurate at possible.
<<watch video demonstration here>>
Have you ever been faced with a quilt pattern that requires you to cut dozens (or 100s!) of a certain size square or rectangle? How about cutting all. those. sashing. strips. or binding for that queen size quilt you're making? Those instructions can be enough to make you want to throw in the towel right away...it seems like you'll be cutting forever and never get to sewing, let alone finish...unless you have a True Cuts ruler!
Let's start with the basics and show you how these rulers work and make your (rotary cutting) life easier:

True Cuts rulers come in three size options: 7 1/2" x 12", 12 1/2" x 12 1/2", and 18 1/2" x 22". Each one is used the same way, as I'll show you below, but they are useful for different projects. Choose the one -or all three- that makes sense for the fabric you are working with and quantity of pieces needed. The small and medium size options are ideal for smaller spaces, travel, and quickly cutting small to medium size fabrics.
The largest size is the biggest ruler of this type you can buy. The cutting grooves are long enough to cut a whole fat quarter or width of fabric piece (folded) into strips, squares, rectangles and more.

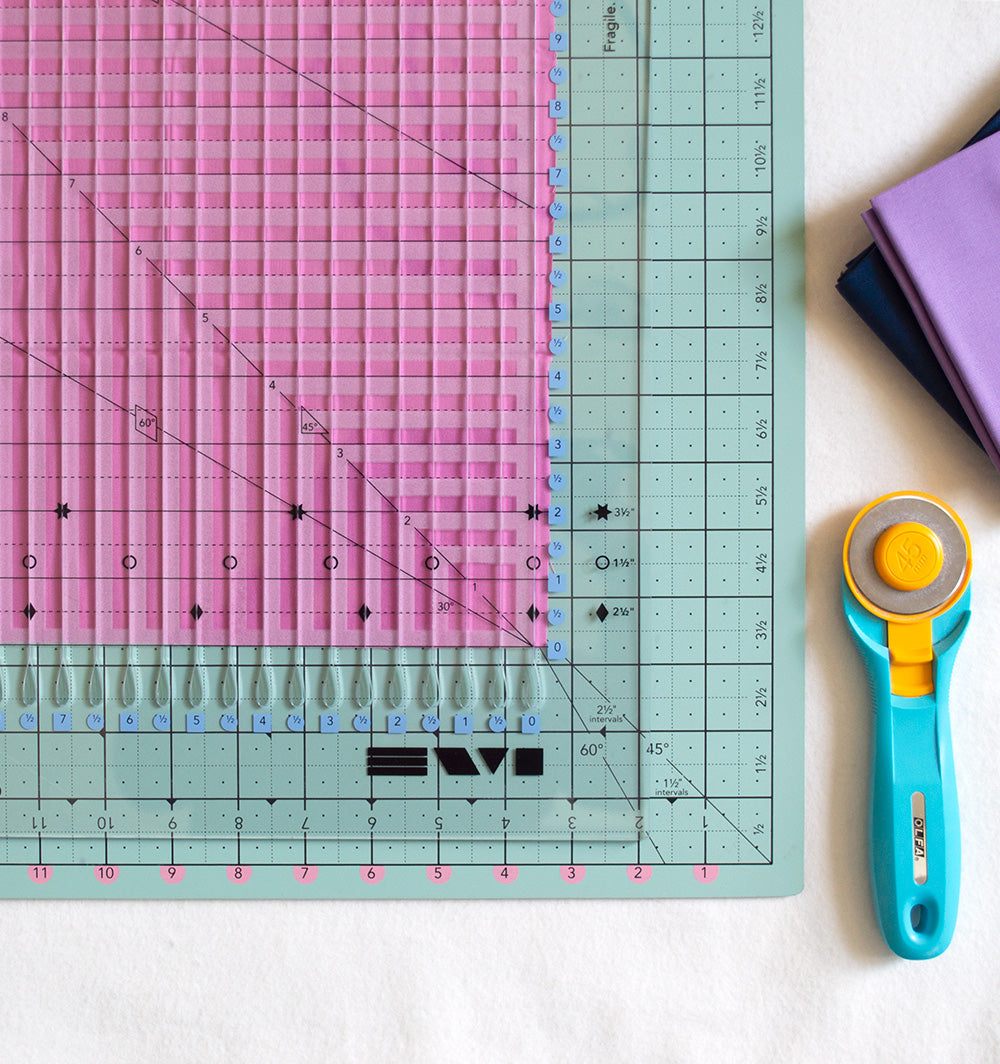
Let's take a look at the parts of our True Cuts ruler and how it works:
- Numbers that run horizontally across the bottom of the ruler: these numbers correspond with the cutting grooves and the measurement, in inches, away from '0' at the right side of the ruler. Cutting grooves are 1/2" apart.
- Numbers that run vertically away from you up the right side of the ruler: these numbers indicate the measurement, in inches, as you move away from the horizontal '0' line.
- "No Math" quick reference marks: stars indicate cutting grooves that are 3 1/2" apart, circles indicate cutting grooves that are 2 1/2" apart, and diamonds indicate cutting grooves that are 1 1/2" apart. This helps you make accurate cuts quickly without calculations.
- Angles: 30, 45, and 60 degree lines will assist in cutting triangles, bias strips, diamonds...anytime you need an angled cut.
How to use your True Cuts Ruler to cut strips:
1. Trim selvedges edges off fabric. This can be done with the True Cuts ruler or a standard straight ruler.
2. Place fabric with straight edge (or fold) aligned with a horizontal line on the cutting mat.

3. Position ruler on top of fabric so that the straight edge (or fold) that is closest to you is aligned with the horizontal '0' line.
4. Adjust ruler as needed to position the right hand edge of the fabric as close as possible to the vertical '0' line. If this edge of the fabric is not straight, position the uneven edge of the fabric to the right of the vertical '0' line so that you can trim off the uneven edge and straighten it.
5. First cut: stabilize ruler with your non-dominant hand. Hold rotary cutter with dominant hand. Place rotary cutter blade into the cutting groove at '0'. Press blade through the groove so it meets the mat underneath, then push cutter through the groove moving away from you as it cuts the fabric. Remove blade at the far end of the cutting groove. DO NOT MOVE FABRIC OR RULER.
6. Second cut and beyond: determine width of strips needed for your pattern. Move left horizontally from the '0' to find the measurement you need. Place the blade into that cutting groove and repeat step 5.

7. Continue moving horizontally and making cuts at desired intervals to cut multiple strips without moving the ruler or fabric.
8. Lift ruler and set aside. Move the cut strips away and repeat steps until you have as many strips as you need for your project.
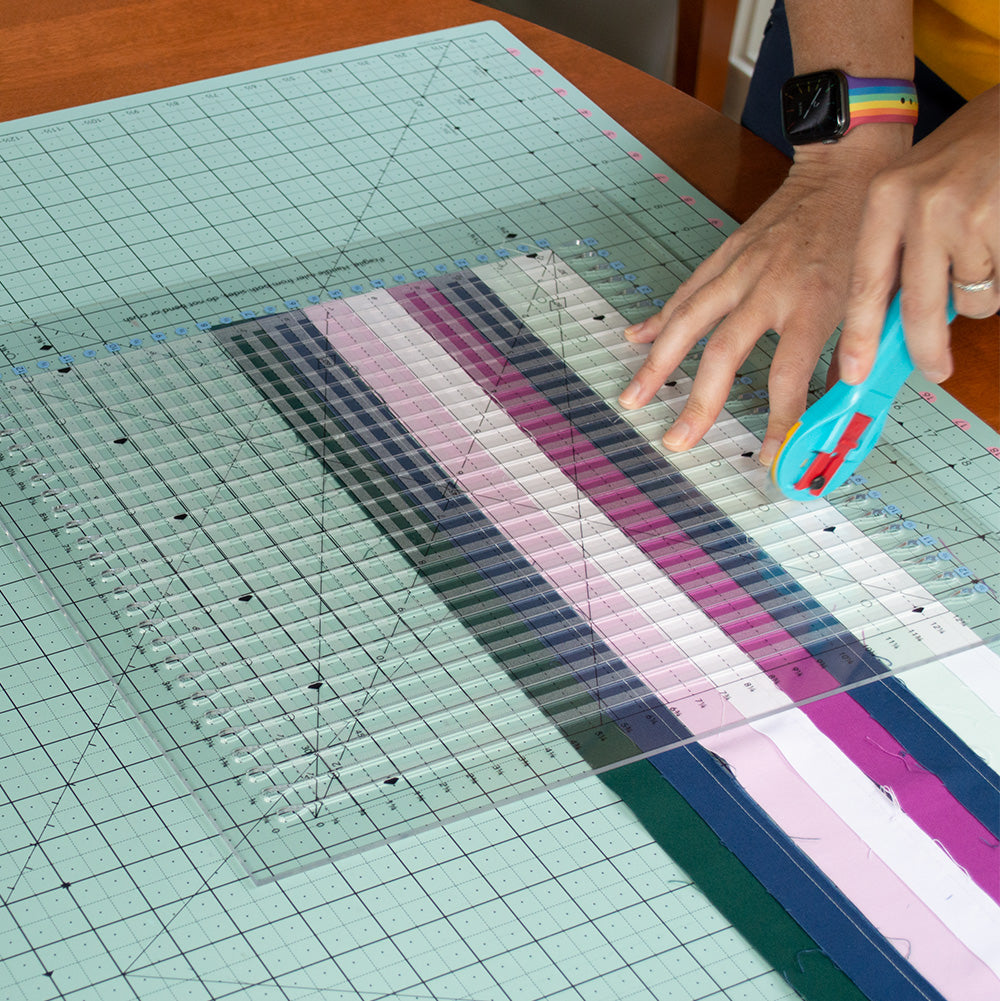
How to use your True Cuts ruler to cut squares and rectangles:
1. Arrange strips of fabric on the cutting mat. Cut multiples by placing as many strips as you can fit for the ruler size you have. Place strips next to each other, keeping them straight using the lines on the cutting mat for reference.

2. Position the True Cuts ruler so that the straight edge of the nearest strip is aligned with the horizontal '0' line of the ruler. The ends of the strips should align or be slightly to the right of the vertical '0' line on the ruler.

3. Hold the ruler in place with your non-dominant hand, and cut through the '0' cutting groove to straighten the ends of the strips.

4. Make subsequent cuts at the measurement you want for your squares or rectangles. In the photos, I am cutting 2 1/2" strips into 2 1/2" squares, so I'll make cuts at the '0' groove, then 2 1/2, then 5, then 7 1/2" and so forth.

2 comments
Karen sheplrr
Was looking forward to ruler when I opened it the top edge of ruler was broke wrote in to see about a replacement 12 1:2 × 12 1/2 ruler w no word from company nor a new ruler or information to send it back
Any suggestions how to use a broken ruler ?
Judy Greenwood
I enjoyed watching the videos! I have learned more info, so I am anxious to try what I have learned! I purchased the biggest and now am purchasing the medium sized rulers. Thank you, Judy
Leave a comment
This site is protected by hCaptcha and the hCaptcha Privacy Policy and Terms of Service apply.