
A half square triangle (often abbreviated HST) is a simple unit of fabric with two right-angled triangles sewn together to form a square. You see them everywhere in the quilting world! If you want to break free from making basic patchwork quilts, you must learn how to make these popular HST blocks.
Making half square triangles is not hard, so don’t be scared. If you perform a simple internet search, you’ll find dozens of tutorials on how to make them 2 at a time, 4 at a time, and even 8 at a time. These methods all work, but we wanted to show you the most efficient way to make them — Triangles on a Roll! This also happens to be one of the easiest and most accurate methods of making HSTs.

How to Use Triangles on a Roll
Triangles on a Roll can be purchased at most quilt shops, including Love Sew. This roll of paper has a one-time-use pattern printed on it for sewing and cutting half square triangles. It is the most efficient way to make half square triangles because it eliminates all the tedious measuring and cutting. You simply pin the pattern to your fabric, follow the dashed lines for sewing, and then cut out your HSTs following the solid lines. It’s so easy!
If you’re still skeptical of using Triangles on a Roll, here are some more detailed instructions on how they work:
Step 1: Choose the Correct Size Paper and Cut Strips of Fabric
Triangles on a Roll come in several sizes ranging from 1-inch to 4-inches. The size on the package refers to the finished size of the HST.
For this post, we used 2-inch Triangles on a Roll. The package said to cut strips of fabric 6.5 inches wide by our desired length. The more triangles you need, the longer you should cut your strips. The cutting does not have to be perfect because you’ll be trimming in a later step, so don’t be too fussy here.
Press your strips so they start out completely flat before moving to the next step.
Step 2: Pin the Paper to Your Strips
Choose two strips of fabric and place them right sides together. Then, attach the HST grid paper on top with pins. You’ll be sewing directly on top of the paper, so avoid placing pins on the dashed lines where you'll be sewing.
I placed one pin in the center of every 4 triangles and then 2 extra pins on the sides so that the paper would not shift at all while sewing.
Step 3: Sew on the Dashed Lines
Head to your sewing machine and set your stitch length to 1.5. This is important because it makes tearing the paper off easier. Sew continuously on the dashed lines, following the direction of the printed arrows.

Step 4: Trim the Half-Square Triangles
Remove the pins and then cut on all the solid lines. We used a ruler for the longer cuts and then freehanded the rest.
Pretty soon you’ll have a pile of half square triangles ready to be pressed. We made over 100 HSTs in under an hour!

Step 5: Separate the Half Square Triangles from the Paper
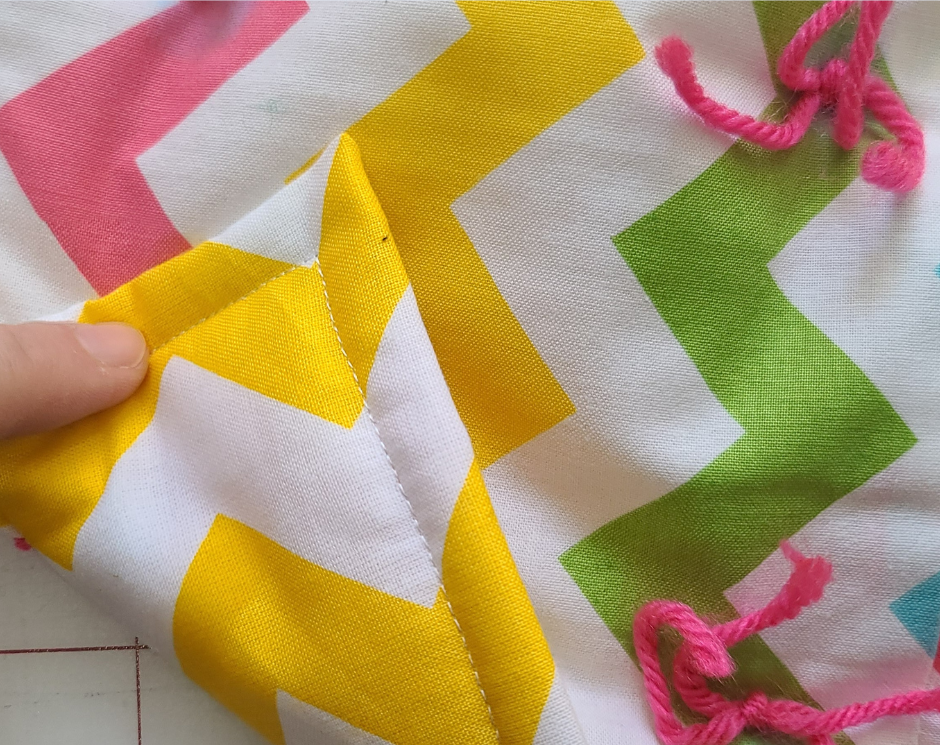
Carefully tear the paper off the HSTs. Start from the center to prevent loosening the stitches at the corners. We found it works best to finger press the paper open at the seam before tearing. This step almost takes longer than the actual sewing. 😅
Step 6: Press the Half Square Triangles and Trim Dog Ears
Press the HSTs with the seam towards the darker-colored fabric and then trim off the dog ears. A rotating cutting mat is super helpful for all the trimming.

The Triangles on a Roll Debate
We think Triangles on a Roll are great, but there are a couple of downsides to using them. For example, we wouldn’t recommend Triangles on a Roll if you need a lot of control over pattern orientation. They are best for solids and when you’re using fabric with a non-directional print.
Some people also think the added cost of Triangles on a Roll is not worth it. You’ll have to decide for yourself, but they certainly do help cut down on the time it takes to make a lot of half square triangles at once, and you get very accurate results without all the tedious measuring.
What do you think? Have you used Triangles on a Roll before? Do you think they are worth it? Let us know in the comments below.
9 comments
Chris
Love this product. I have used for 2 different sizes and find the time it saves and the accuracy is well worth the cost! Thank you.
Patrick G
Yes it is
Anonymous
Great product!
Kay White
I’ve used this product, works very well certainly speeds up the process
Sandra Redlands
This works just fine without paper and is just as accurate — been doing it for many years - Just cut whatever size big squares you need iron them together face to face and draw out the 2 cross lines and you are all set. I find the paper system a real pain but whatever works for the individual is what one should use.
Leave a comment
This site is protected by hCaptcha and the hCaptcha Privacy Policy and Terms of Service apply.