
Dear Geraldine,
I'm hearing SO. Many. Opinions about pressing seams on quilt blocks. My head is spinning.
Can you give me the skinny on what I REALLY need to know about block seams?
-Spinning in Seabring
Dear 'Spinning,'
Ah, the opinions that fly around the quilt world...
Yes, there are lots of them. Especially about pressing. It's hard to know what to take to heart.
Pressing is important! It determines how 'professional' your finished quilt appears, how your blocks to together, and even the longevity of your quilt!
To help you and anyone else who is doubting, I put together a list of 15 tips which I have personally found to be most important. Read on, or download your list here for future reference.
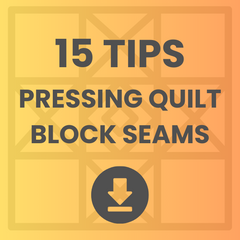
Top 15 Tips for Pressing Quilt Blocks
-
Set your seams: Before pressing, run your iron over the seam with a dry iron to set the stitches. This helps meld the thread into the fabric.
-
Use the right tools: Invest in a hot iron with steam capabilities and a sturdy wool mat and wool ironing board cover.
-
Press, don’t iron: Use an up-and-down motion rather than sliding the iron back and forth to avoid distorting the fabric.
-
Press as you go: Press each seam as you complete it rather than waiting until the entire block or quilt top is finished. -Easier to manage and ensures better accuracy.
-
Start on the wrong side: Begin pressing on the wrong side of the fabric to avoid pressing any seam allowances in the wrong direction.
-
Finger-press first: Before using the iron, use your fingers to press the seam open or to the side. This helps set the seam and makes it easier to press with the iron.
-
Press to the dark side: When possible, press seam allowances towards the darker fabric to reduce the visibility of seams through lighter fabrics.
- Alternate pressing direction: If you’re working on blocks that will be sewn together, alternate the direction of pressing (left, right, left, etc.) to make nesting seams easier.
-
Press open for less bulk: Consider pressing seams open for reduced bulk, especially when dealing with multiple intersecting seams.
- Check the pattern instructions: Follow the pattern instructions for pressing directions. Some patterns may specify pressing all seams in one direction for nesting purposes.
-
Avoid stretching: Be gentle when pressing to avoid stretching the fabric. Hold the fabric taut, but don’t pull on it.
-
Press the borders last: If your quilt has borders, press them last to avoid stretching the quilt top during assembly.
-
Take your time: Rushing through pressing can lead to mistakes. Take your time to ensure accurate and neat results.
-
Use a dry iron: Sometimes, pressing with a dry iron is preferable, especially when working with unwashed fabrics that may shrink or intricate piecing.
- Practice good ergonomics: Adjust the height of your ironing board and the position of your iron to maintain good posture and reduce fatigue.
I hope this list makes your pressing endeavors more successful. Readers, please comment if you have any additional tips for 'Spinning in Seabring.'
As always, thanks for reading, sewing friends, and happy sewing!
XOXO,
Geraldine
5 comments
PhylnBiever: Glad to know you are still quilting at age 91. I will be 91 in July and still quilting, too. Love it. Creative juices still running free!!
Phyl! That’s fantastic! Keep on quilting!!
Thank you for these helpful tips!
Thank you for these helpful tips!
Thank you asI get older I need to be reminded of ways to do things correctly. I’m 91 and still sewing making quilts